
Introduction
One of the great things about Aurelia is how it simply gets out of your way and allows you to focus on your own code. Another thing that's great about Aurelia is that it makes it easy to write your very own Todo list application. And let's be honest, Todo list applications are about 90% of the reason that all modern JavaScript frameworks exist.
I kid.
As many who have met me at various conferences will know, I have extensive experience as a .Net developer. This means I've spent a ton of time learning .Net concepts. One of the common things in the .Net space when introducing new concepts is doing it within a console application. A console application allows the reader to focus only on what is being taught, without needing to think about how things work within an ASP.Net MVC or Web API context. This gave me an idea to create a Todo list application in NodeJS. I'm a core team member for a JavaScript framework, so I have to create a new Todo list application at least every few weeks or I start to get a bit of a nervous twitch.
Getting started
I decided to use TypeScript for this application simply because I've been wanting to use it lately. I use Visual Studio Code as my preferred editor, and the tooling provided in VS Code definitely makes TypeScript development very pleasant. I also decided I would simply use ts-node to run the application I would build, rather than set up a full build process. Since I'm not planning to distribute my Todo list console application, this just makes my life simpler.
So let's get started building our application. First, I'm going to define a Todo class to represent each Todo item. Todos will have a description and a done property stating whether or not the item has been completed. I'll use a TypeScript language feature to define these properties directly in the constructor for the class. Also, I'll default done to be false:
todo.ts
export class Todo {
  constructor(public description: string, public done: boolean = false) {
  }
}
That's simple enough. Now all we need to do is create a class that represents the all-important Todo list. It will have a todos array property that contains all the Todo items. It will also have a addTodo and removeTodo functions to manipulate the list of todos. Here's the code for TodoList:
todo-list.ts
import { Todo } from './todo';

export class TodoList {
  public todos: Todo[] = [];

  addTodo(description: string) {
    const newTodo = new Todo(description);

    this.todos.push(newTodo);
  }

  removeTodo(todo: Todo) {
    const index = this.todos.indexOf(todo);

    if (index >= 0) {
      this.todos.splice(index, 1);
    }
  }
}
That's it for the business logic of our application. We can add and remove todos. If we need to mark a todo as done/not done, we simply modify the done property of the Todo instance in questions.
Writing the Console Application
It turns out that writing a console Todo list application in NodeJS is a bit involved, but that's no big deal. First, we will instantiate a TodoList object.
const todoList = new TodoList();
Next, we'll present our user with a list of actions that can be performed. It'll look something like this:
What would you like to do?
1. Add todo
2. Remove todo
3. Toggle todo done
:
Then the app can enter any of the three modes named. If the user gives an invalid input, we simply ignore the input and ask again. If the user decides to add a todo item, we will ask the user for the todo description, then we'll call todoList.addTodo passing it the description. The UI will look like this:
Please give me a description and I'll add a todo to the list.
:
If the user decides to remove a todo item, we'll present the user with the list of todos and ask which one to remove. It should look something like this:
0. Desc: Do laundry, Done: No
1. Desc: Do dishes, Done: No

Please select an item to remove.
:
Finally, if the user decides to toggle a todo's done property, we'll present the user with a list of todos and ask which one to toggle. It should look something like this:
0. Desc: Do laundry, Done: No
1. Desc: Do dishes, Done: No

Please select an item to toggle being done.
:
Once the user completes an action, they are returned to the "main menu," if you will. This means we need to create a loop. In C#, I would probably use a do/while loop to do this. But Node's asynchronous nature requires a slightly different approach to this. We use the callback model to our advantage to set this up. First, we need to use the createInterface method from the readline module that's included with Node. We'll call createInterface and tell it to use the standard input for its input and standard output for its output.
We'll do this by creating a file called index.ts and putting the following code in it:
import { createInterface } from 'readline';

const rl = createInterface({
  input: process.stdin,
  output: process.stdout
});
Now we'll set up callbacks to for the line and close callbacks. The line callback function receives a single string parameter that is the line of input. The close callback allows us to say goodbye to the user and clean up anything we need to cleanup and then exit the program.
rl.on('line', function (line: string) {
  const input = line.trim();
  handleInput(input);

  prompt();
}).on('close', function () {
  console.log('Have a great day!');
  process.exit(0);
});
Now, you see the the handleInput and prompt functions being called in the line callback. Those are helper functions I wrote to help abstract away the dirty work of actually handling the application. Let's look at them.
function handleInput(input: string) {
  if (!input) {
    console.log(`Unrecognized command`);
    return;
  }

  switch (selectedPromptMode) {
    case PromptMode.Main:
      handleMainQuestion(input);
      printTodos();
      return;

    case PromptMode.AddTodo:
      handleAddTodo(input);
      break;

    case PromptMode.RemoveTodo:
      handleRemoveTodo(input);
      break;

    case PromptMode.ToggleTodoDone:
      handleToggleTodoDone(input);
      break;
  }

  printTodos();
  selectedPromptMode = PromptMode.Main;
}

function prompt() {
  const prompt = `${questions[selectedPromptMode]}\n: `;
  rl.setPrompt(prompt);
  rl.prompt();
}
Now we're starting to get in to the meat of my code. You can tell that I have created a TypeScript enum to handle what "mode" the application is currently in. Based on the mode, I'll call a function to actually handle the input. Once the input has been handled, I'll print the list of todos and return to "Main" mode, except for when I was in "Main" mode to begin with. In that case, I simply print the todo list and return. This isn't really a scalable solution, but for this simple application, it is good enough.
I've also created an array of prompts to show the user that is ordered the same as the enum is ordered. I use this to set the prompt for the user. I exploit the ordering of the enum again to help handle user input.
Next, let's look at the remaining functions in this application.
function handleMainQuestion(input: string) {
  switch (input) {
    case '1':
      selectedPromptMode = PromptMode.AddTodo;
      break;
    case '2':
      selectedPromptMode = PromptMode.RemoveTodo;
      break;
    case '3':
      selectedPromptMode = PromptMode.ToggleTodoDone;
      break;
    default:
      console.log(`Unrecognized command`);
      return;
  }

  printTodos();
}

function printTodos() {
  let counter = 0;

  console.log(``);
  for (const todo of todoList.todos) {
    console.log(`${counter++}. Desc: ${todo.description}, Done: ${todo.done ? 'Yes' : 'No'}`);
  }

  console.log(``);
}
handleMainQuestion will check the user's input and set the prompt mode. As long as it is a valid input, it will then print the list of todos, since all of the modes that can be set in this function require displaying the list of todos. printTodos is a helper functions to print the list of todos.
function handleAddTodo(input: string) {
  if (!input) {
    console.log(`You must enter a description.`);
    return;
  }

  todoList.addTodo(input);

  console.log(`Todo item added. Here's your todo list`);
}

function handleRemoveTodo(input: string) {
  const selectedTodoIndex = Number(input);

  if (Number.isNaN(selectedTodoIndex) || selectedTodoIndex > todoList.todos.length - 1) {
    console.log(`Unrecognized command`);
    return;
  }

  todoList.removeTodo(todoList.todos[selectedTodoIndex])

  console.log(`Todo item removed. Here's your todo list\n`);
}

function handleToggleTodoDone(input: string) {
  const selectedTodoIndex = Number(input);

  if (Number.isNaN(selectedTodoIndex) || selectedTodoIndex > todoList.todos.length - 1) {
    console.log(`Unrecognized command`);
    return;
  }

  const selectedTodo = todoList.todos[selectedTodoIndex];

  selectedTodo.done = !selectedTodo.done;


  console.log(`Todo item marked ${selectedTodo.done ? 'done' : 'not done'}. Here's your todo list\n`);
}
These three functions are fairly simple. The simply add or remove todo items use the TodoList class API, or directly toggle an individual todo list item's done property.
So now we've created a todo list console application. Let's see how it looks when running the app:
What would you like to do?
1. Add todo
2. Remove todo
3. Toggle todo done
: 1


Please give me a description and I'll add a todo to the list.
: Do the dishes
Todo item added. Here's your todo list

0. Desc: Do the dishes, Done: No

What would you like to do?
1. Add todo
2. Remove todo
3. Toggle todo done
: 1

0. Desc: Do the dishes, Done: No

Please give me a description and I'll add a todo to the list.
: Walk the dog
Todo item added. Here's your todo list

0. Desc: Do the dishes, Done: No
1. Desc: Walk the dog, Done: No

What would you like to do?
1. Add todo
2. Remove todo
3. Toggle todo done
: 3

0. Desc: Do the dishes, Done: No
1. Desc: Walk the dog, Done: No

Please select an item to toggle being done.
: 1
Todo item marked done. Here's your todo list


0. Desc: Do the dishes, Done: No
1. Desc: Walk the dog, Done: Yes

What would you like to do?
1. Add todo
2. Remove todo
3. Toggle todo done
: 2

0. Desc: Do the dishes, Done: No
1. Desc: Walk the dog, Done: Yes

Please select an item to remove.
: 0
Todo item removed. Here's your todo list


0. Desc: Walk the dog, Done: Yes

What would you like to do?
1. Add todo
2. Remove todo
3. Toggle todo done
: Have a great day!
We had to write a bit of code to create the console app, but that's to be expected. The nature of a simple console app leads to this type of coding. It wasn't too bad at all, really. But what if I wanted to take my Todo list application and port it to Aurelia so I can fulfill my weekly quota of writing Todo list applications?
Port our app to Aurelia
First, we're going to need to create an Aurelia app. I'll use the Aurelia CLI to make this simple. I'll run au new from my command line. If I didn't have the Aurelia CLI already installed, I could do this simply by running npm install -g aurelia-cli. I'll accept the default app name (aurelia-app), choose the "Default TypeScript" setup, and then create the project. Finally I'll have the CLI run npm install for me. It'll look this:
$ au new
                      _ _          ____ _     ___
  __ _ _   _ _ __ ___| (_) __ _   / ___| |   |_ _|
 / _` | | | | '__/ _ \ | |/ _` | | |   | |    | |
| (_| | |_| | | |  __/ | | (_| | | |___| |___ | |
 \__,_|\__,_|_|  \___|_|_|\__,_|  \____|_____|___|


Please enter a name for your new project below.

[aurelia-app]>

Would you like to use the default setup or customize your choices?

1. Default ESNext (Default)
   A basic web-oriented setup with Babel for modern JavaScript development.
2. Default TypeScript
   A basic web-oriented setup with TypeScript for modern JavaScript development.
3. Custom
   Select transpilers, CSS pre-processors and more.

[Default ESNext]> 2

Project Configuration

    Name: aurelia-app
    Platform: Web
    Transpiler: TypeScript
    CSS Processor: None
    Unit Test Runner: Karma
    Editor: Visual Studio Code


Would you like to create this project?

1. Yes (Default)
   Creates the project structure based on your selections.
2. Restart
   Restarts the wizard, allowing you to make different selections.
3. Abort
   Aborts the new project wizard.

[Yes]> 1
Project structure created and configured.

Would you like to install the project dependencies?

1. Yes (Default)
   Installs all server, client and tooling dependencies needed to build the project.
2. No
   Completes the new project wizard without installing dependencies.

[Yes]> 1
This will create a aurelia-app folder. Inside the folder is a src folder where all of the code for our Aurelia application needs to go. I'll go ahead and copy over the todo-list.ts and todo.ts files to that folder. I'm going to delete app.ts from the src folder and rename todo-list.ts to app.ts. I'll then edit app.html to look like this:
<template>
  <form submit.delegate="addTodo(description)">
    <input type="text" value.bind="description" />
    <button type="submit">Add todo</button>
  </form>

  <ul>
    <li repeat.for="todo of todos"
        css="text-decoration: ${todo.done ? 'line-through' : 'none'}">
      <input type="checkbox" checked.bind="todo.done" />
      ${todo.description}
      <button click.delegate="removeTodo(todo)">
        Remove
      </button>
    </li>
  </ul>
</template>
Here, I'm using basic Aurelia data-binding commands to bind to the TodoList. This HTML is all I need for my Aurelia application. You'll notice that I've created a description property that only lives in the view. There's no need to declare it our viewmodel.
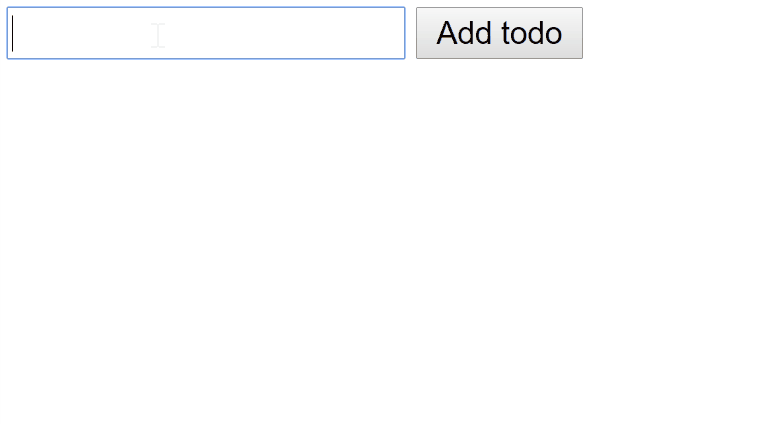
To run the app, I just cd aurelia-app to enter the directory for the application. Then I run au run and browse to http://localhost:9000. Let's see what our app looks like:
Conclusions
The really neat thing to see in porting the app from Node to Aurelia is how we're able to take our business logic over completely untouched. We wrote simple classes that don't use any Node-specific modules, and they work without any changes in Aurelia. Also, Aurelia's templating and binding system made building our UI very simple. Aurelia helps you focus on your application's code, which is the most important code!